Getting Started with Itinerary Planning
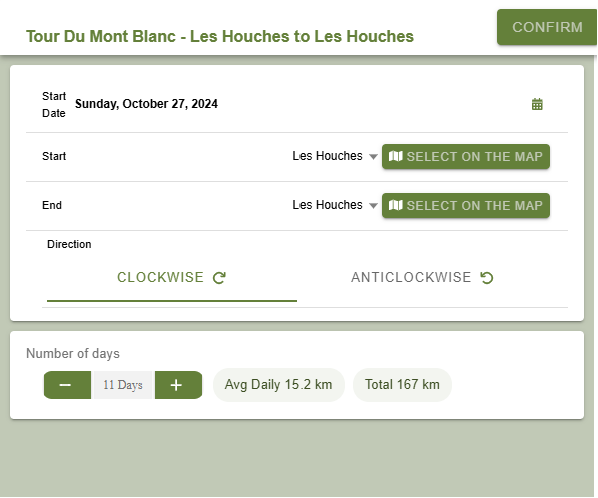
To start planning your next hike with Itinerhike, click on the “Plan Itinerary” button. This will open a pop-up window where you can set your preferences, such as the starting and end locations, the starting day, alternative routes, and the number of days for your hike.

Customize your options to ensure your hiking experience meets your needs:
- Select Your Start Date: Start by choosing the date for your hike.
- Choose Your Location: Next, select your starting or ending location. If your desired location isn’t on the list, you can easily pick it from the map. Just click the “Select on Map” button, then click on the map to choose a spot near the trail. After making your selections, click on “Plan Itinerary” again.
- Select the Number of Days: Finally, specify how many days you plan for your hike.
- Select Alternatives: Some trails may have alternative routes that branch off from the main trail. You can select from the list of alternatives or use the “Select on Map” feature. Click next to a black line on the map to choose an alternative route.

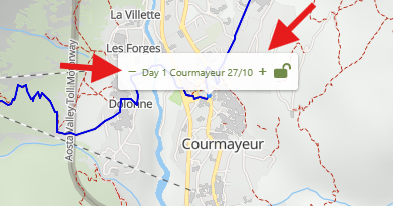
Click ‘Confirm’ when you’re ready. Itinerhike will then generate the best itinerary to match your preferences. You can easily edit each stage using the ‘+’ and ‘-‘ buttons to customize your itinerary further. This can be done for different reasons, such as if you prefer not to stay in a city and would rather lodge in a cozy hut, or if a particular location is fully booked.

Click the lock button to secure your location once you are certain of your stay
Share your itinerary with your friends
Click on the “Share” button to open the sharing pop-up. From there, you can copy the link to your itinerary and easily share it with your friends using the “Copy Link” button. Alternatively, you can use the QR code for a quick way to let your friends scan and access it.
